There are more than two ways to create a fillable form. You can create it from Microsoft Word, Excel, PowerPoint, using online designer tools and readymade forms like Google forms or JotForm, or creating fillable PDF using PDF editor online such as DeftPDF. Here, we will show you 3 different ways on how you can do this easily without paying anything! Let’s start with the offline way – using Microsoft applications.
Creating fillable Microsoft Word forms
Not everybody knows this but you can do so much more with Microsoft Word other than typing and encoding. You see, there’s another tab available that isn’t enabled by everybody on the word application and it’s called the “Developer tool” which can actually allow you to add forms, restrict editing and help you design better. Don’t worry, you don’t need to purchase or add more extensions! You just need to activate it with these simple steps:
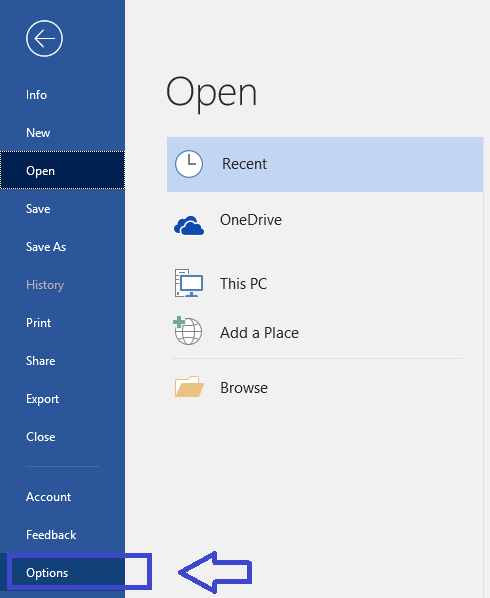
Step one: Activate the developer tool by clicking “File” from the menu then click “Options.”
Step two: On the selection on the left row, click “Customize Ribbon” and tick the box of the “Developer tools” to activate and show its properties on the word application.
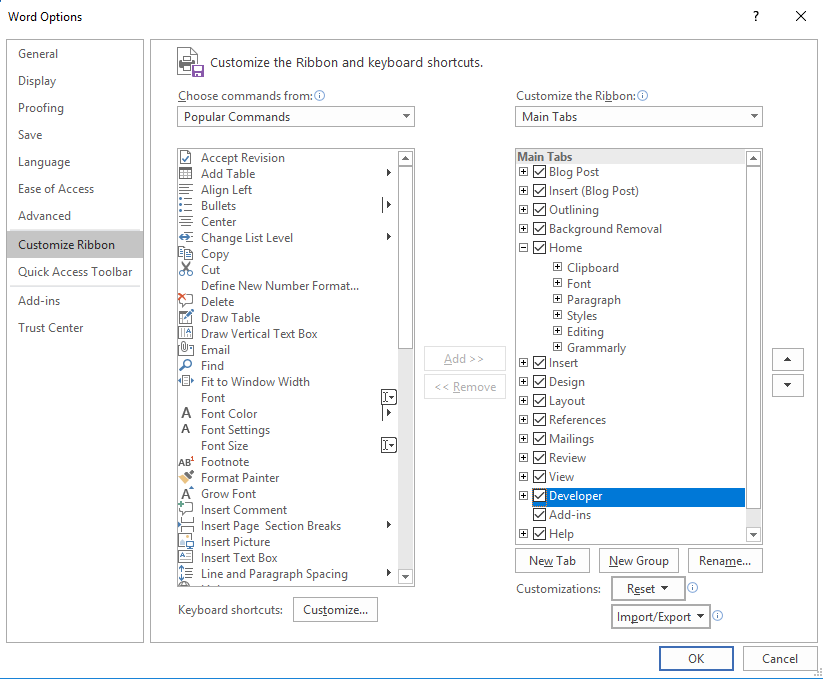
Step three: You will now be able to see the new tab on your Word application – “Developer”

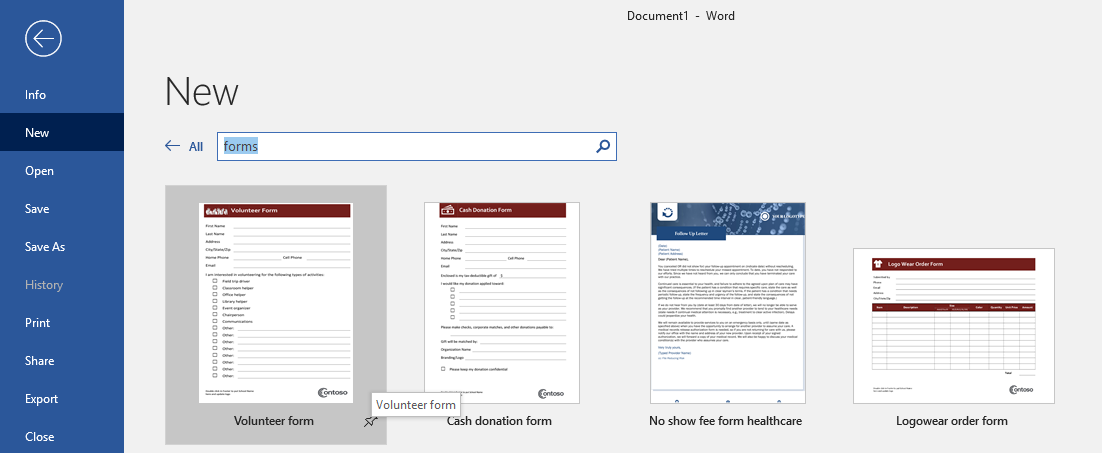
Step four: Now the first thing you need to do is to create your form by encoding all the details you need and the questions you want to include. Design it the way you want the form to appear. You may also use the form templates available from your Microsoft word which can be found when you click “File” then click “new” and search for online templates.
Step five: After encoding your form, protect your it first by clicking “Developer” then click “Restrict Editing.” This will limit the receiver of your form from editing or deleting the questions on your form.

Step six: Add form fields that your audience can fill by clicking “Plain text content control” and place it in the area where your receiver should input their answers. You can also add dropdown lists, checkboxes, images, and more.
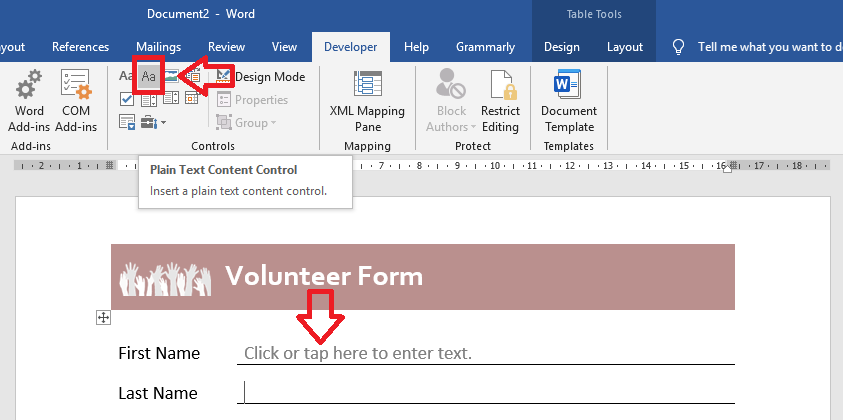
Step seven: After all the editing, click “SAVE” and the form will be ready for distribution as a Microsoft word document.
Quick tip: You can also turn this into a PDF form by saving this as a PDF file then you can use online free PDF editing tool, DeftPDF, to add your text boxes and making it fillable.
Creating a fillable PDF form
Though using Microsoft Word application is quite easy, the downside of saving it as a .DOC form becomes a dilemma due to its format. Since .DOC files are actually editable, the format can change depending on the user. Any special fonts used that isn’t a default font on the application or isn’t installed on the receiver’s computer may become deformed upon receiving it and may affect the layout, alignment and its overall appearance. This will also result in confusion for your receiver, giving them a hard time to fill out the form you sent. So, what better way to create a fillable form? We suggest you can create a PDF file format.
Creating a fillable PDF form isn’t as hard as it looks, in fact, it’s the easiest way and it can be free – if you’re using DeftPDF! Here’s an easy step by step guide on how to create your PDF form online:
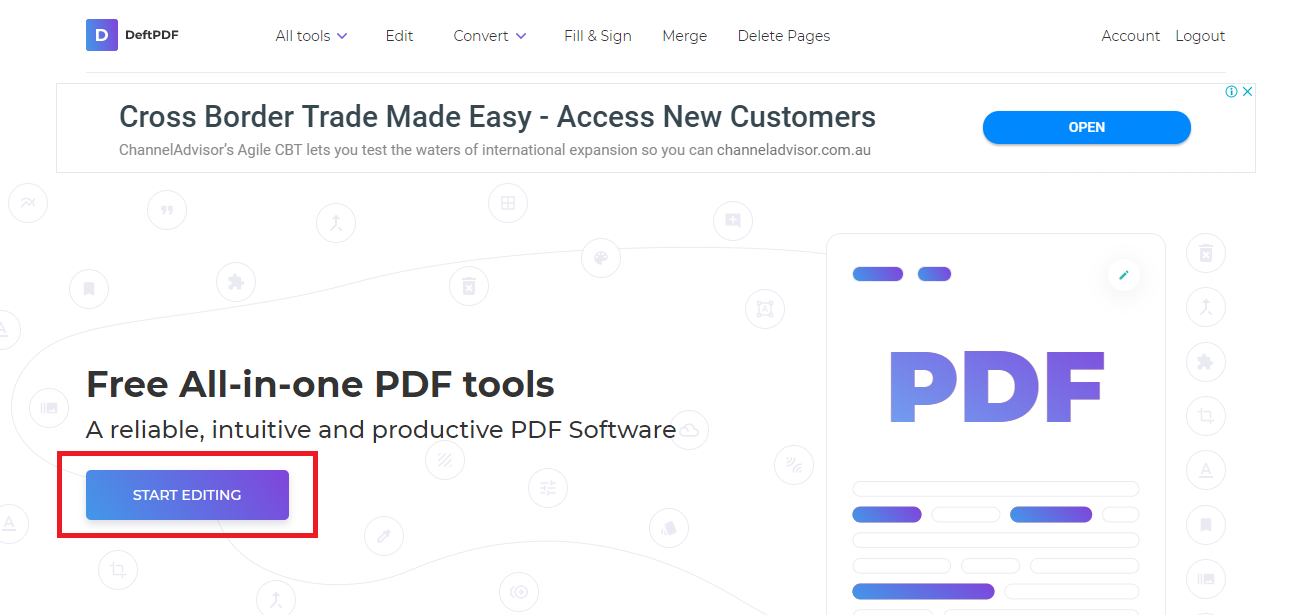
Step one: Go to www.deftpdf.com and click “Start Editing” on the homepage.
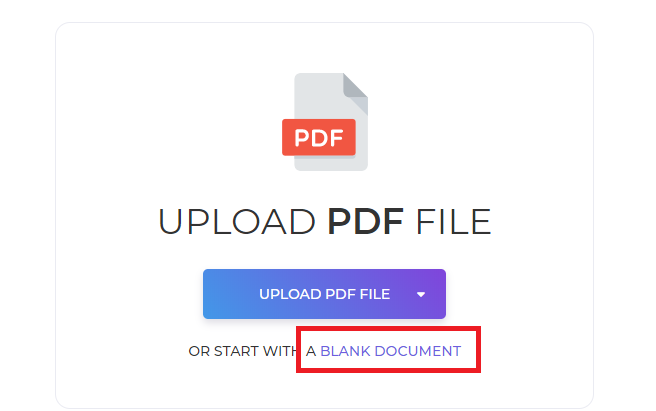
Step two: PDF editor online will appear and prompt you to upload a document but to create a new form, click “start with a new document” under the upload button.
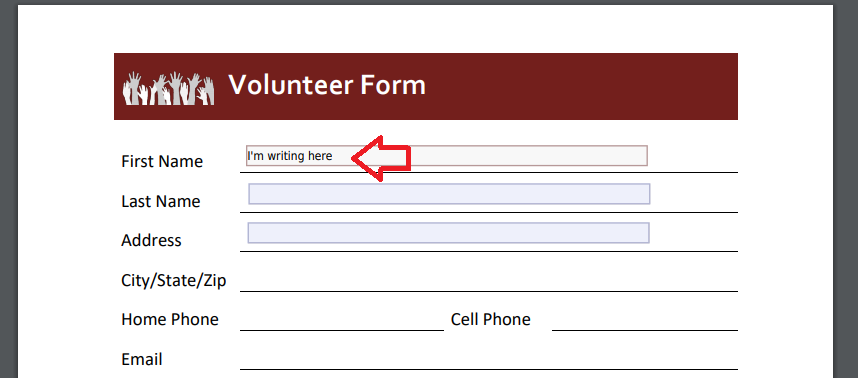
Step three: The site will give you a blank paper to start with. You can write your texts, add images, add shapes, links, and forms by clicking its respective buttons on the editing tool menu. Add all necessary elements as you prefer. Make sure to add your “forms fields” as a text box for your readers. This is where the receiver will fill out their answers. You may also add checkboxes, dropdown lists, bullets, and x marks.
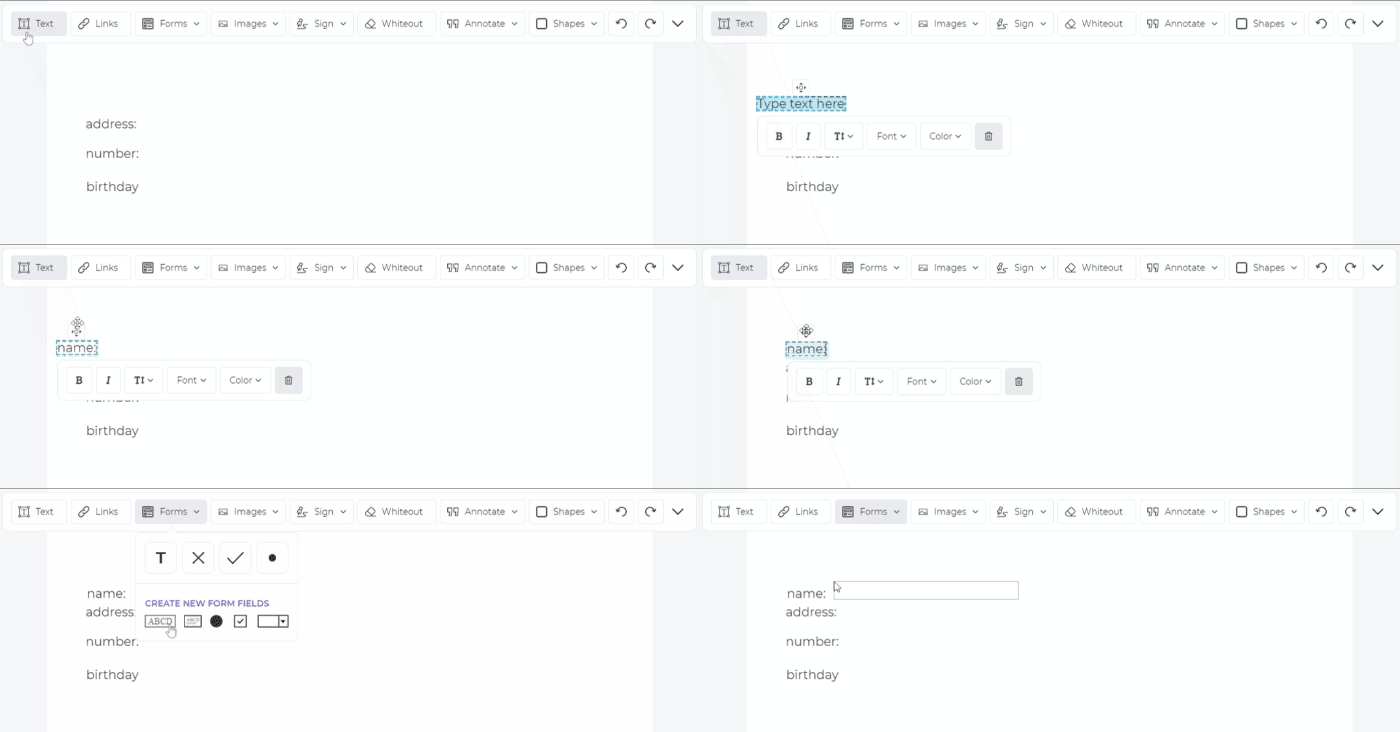
Step four: Once done with your new form, click “Apply changes” then “Download” to save the file to your computer.
If you’ve placed your forms right, your form will look like this and enable your receivers to add their answers on the form without any editing tools.
Creating a fillable form using online forms
If the form doesn’t need to be saved on the computer and you just need something online for your polls or surveys, you can probably try using online forms. This is also easy to use but the downside here is the fact that you can’t save it as an offline form and you can’t attach it in an email. You can probably send the link but it remains online and receivers will also need to be online even if they are just filling it out. Another note to consider is the fact that not all forms online are unlimited to use and free. If it’s free, there’s a limitation to its features and sometimes it only allows a certain number of answers.
There are thousands of online forms available such as Jotform, SurveyMonkey, FormSIte and many more but for the sake of our little demonstration in this article, we will use the most common one – Google forms. Here’s how to create your own online form:
Step one: Log in to your Gmail or Google Drive account
Step two: While you’re signed in, go to https://docs.google.com/forms/

Step three: Choose a template you will use or create a new form with a blank document by clicking its respective thumbnail.
Step four: Add the title of the form, description questions, and select the type of answer. You can add as many form fields, questions, photos, videos, texts and sections as you like. Just click the symbols on the right to add more elements. You can also edit the color and theme of the form.
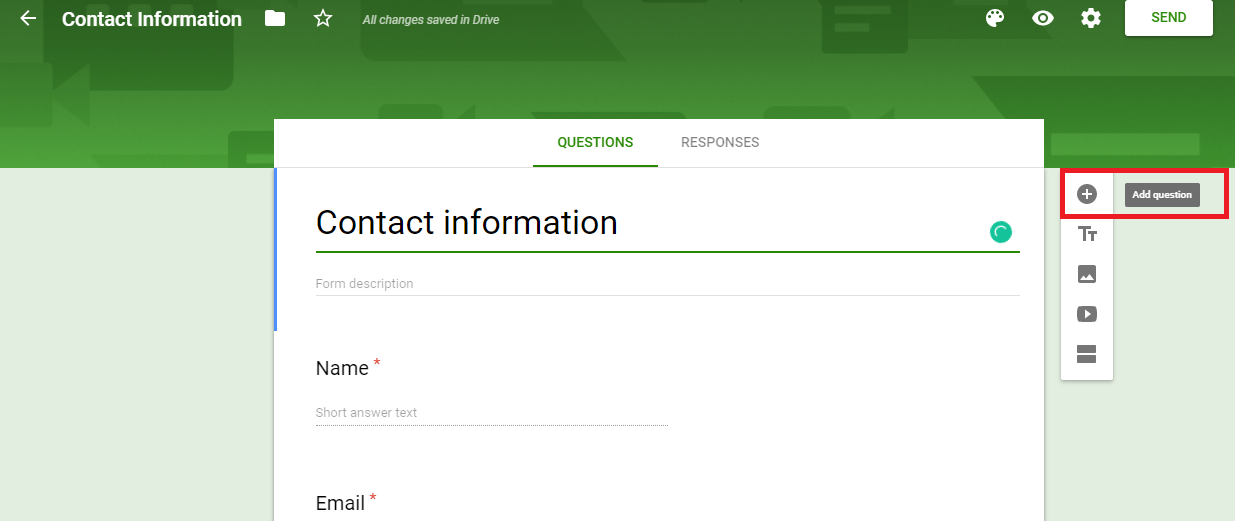
Step five: Once done modifying the form, click “Send” found at the top right of the page. This will give you three options – send it by email, get a link or embed it on your website. Your form and the responses from your readers will be saved automatically on your google drive.
Best recommended way to fillable forms
All three fillable forms are easy and free, it’s just up to you which one you think best fits your needs. We recommend you stay with a PDF format to create your form – its easy, its free, secure, reliable and you can fill it out online or offline. You can try using it online with DeftPDF tools and there are no limits in using the site. You can also do so much more such as protecting, unlocking, translating, cropping, compressing, resizing and many more.
