
Big data, small data or formulas – you name it, you can do it in an Excel. May you be an expert or a beginner, anyone can use this application. Did you know that there are a few shortcuts that you can do to make life easier with this program? Use this like an expert with these tricks and tips that will help you become efficient! Let’s begin!
1. CONVERTING FROM PDF TO EXCEL
You can’t contest that this looks like the hardest thing to do since it seems impossible to extract data from a non-editable document. But the good news is, it isn’t impossible anymore as there are existing online tools that allow you to do this instantly and not to mention, FREE! The online tool we’re talking about is our very own DeftPDF converter tool that can extract your data from PDF to excel files. You can use the tool link here for free: https://deftpdf.com/pdf-to-excel
To proceed with the conversion, all you need to do is follow these 3 simple steps:
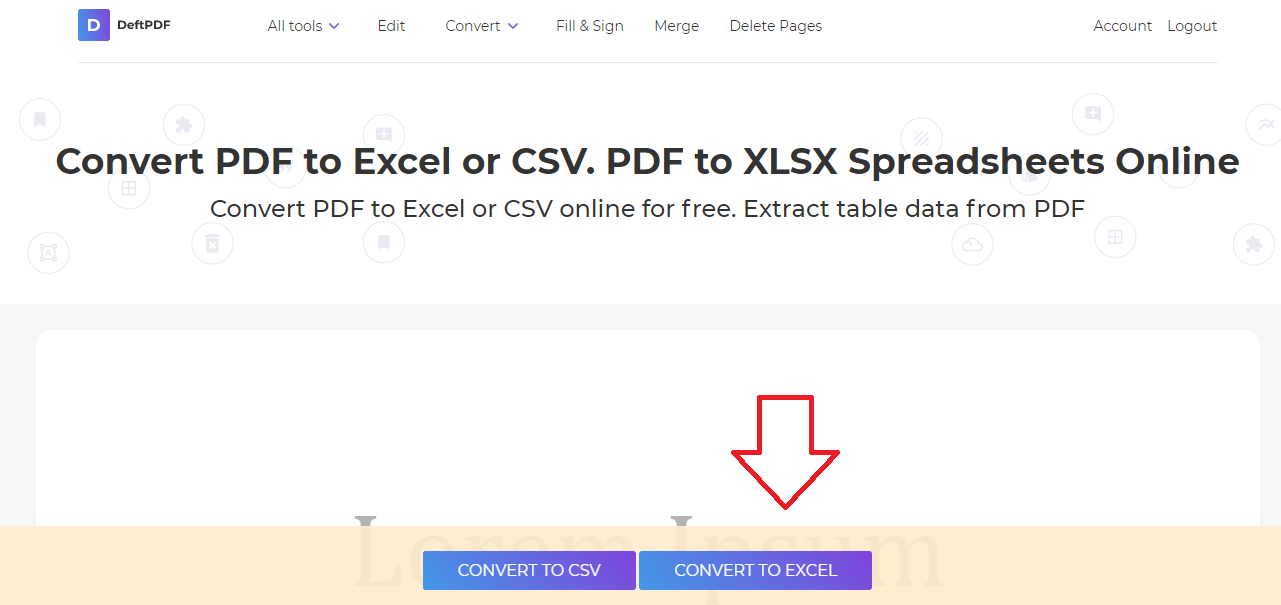
Step one: Go to DeftPDF.com and upload your PDF file to the PDF to Excel Tool

Step two: Once uploaded, click “Convert to Excel” at the bottom of the screen
Step Three: Download your Excel file
Isn’t that easy?
2. EXTRACTING TEXT TO EXCEL
Not everyone knows this but on your Excel application, you can easily import your text file without the need for software or a tool. You can do this like an expert just by following the steps below:
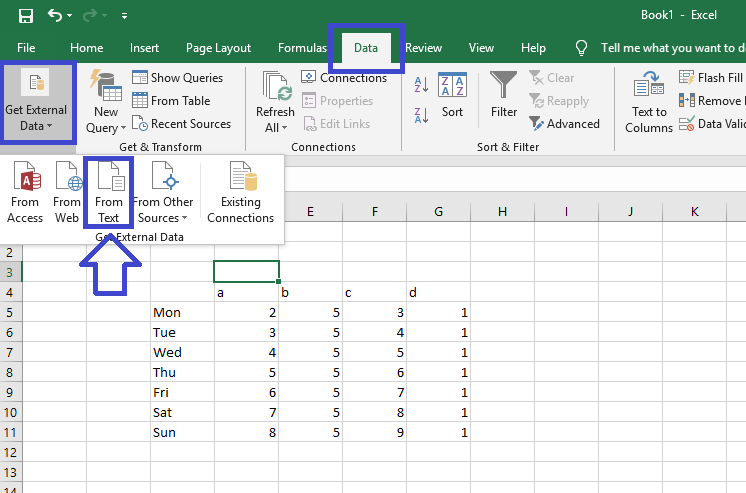
Step one: Navigate to the “Data” tab and clicking “Get External Data” then select “From Text.”
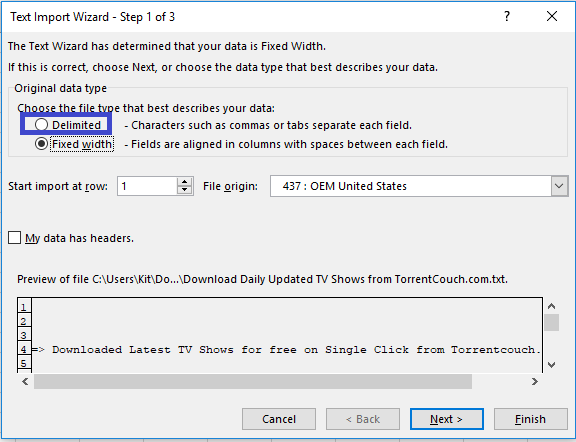
Step two: Choose the text data you want to import from the dialogue box that will appear and import the text data. When options appear, choose “Delimited” and click next.
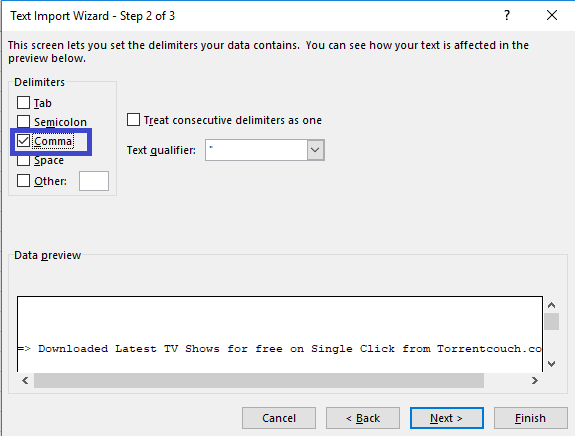
Step three: On the next window, uncheck the tick box of “Tab” and Select “Comma” instead. click “Finish”
Step four: You can choose to put the data on a new sheet or on the existing worksheet
3. CONVERTING EXCEL TO PDF
If you want your data to be securely sent out, and with no possible alterations made, a PDF format is highly recommended. Microsoft has made it possible to save your data and convert it into a PDF file easily. Just choose “save as” and select PDF as your file type then click save.
4. ALT + TAB / CRTL + TAB
View multiple windows or multiple excel files fast by opening the documents and clicking these short cuts. CTL + TAB will switch from one excel file to another while ALT + TAB will switch from one window to another even if it’s not an excel file.
5. SELECT ALL
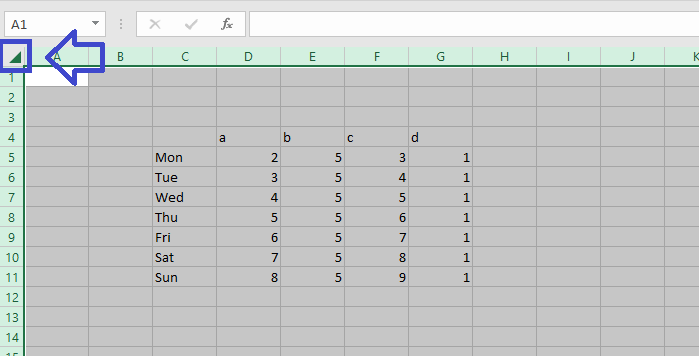
To select everything in your spreadsheet, all you need to do is to click on the box on the upper left side of the sheet.
6. COPY DATA FROM ONE CELL
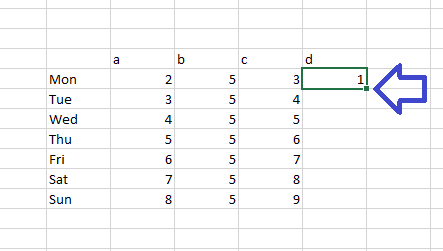
Do you need to copy one cell into all the other cells? Drag the small box on the corner of the cell down and it will copy immediately. You could also do this sideways or upwards.
7. SEQUENCE DATA FROM ONE CELL / CTL + DRAG
Other than copying data, you could also do a sequence. Rather than typing it one by one, just hold the CTRL key and drag the small box again downwards. You’ll find that instead of copying, the numbers will be sequenced in its order e.x. 1,2,3,4,5 instead of 1,1,1,1,1
8. ADD MULTIPLE ROWS / COLUMNS
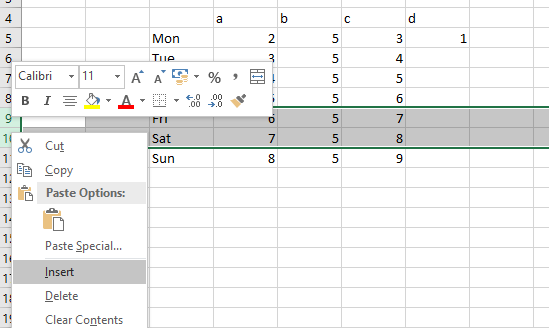
Stop inserting rows or columns one by one and add multiple lines by doing this trick! Select multiple rows/columns then right click and click insert. The number of columns or rows you highlight will be the same number that you will be able to insert.
9. FIND
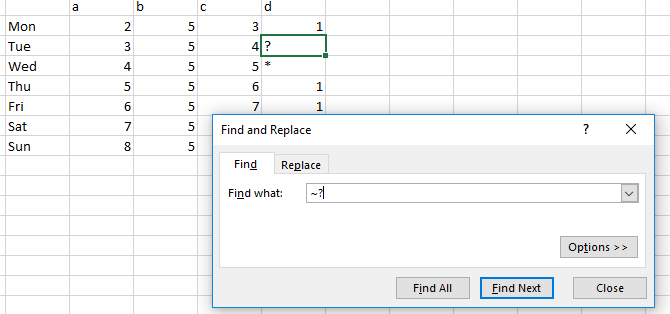
Hold CTRL then press F. A dialogue box will appear to ask what text/word you need to find. Input the text and click search. This will jump from one cell to the text you’re looking for. If you need to find something with a question mark or an asterisk, always add a wave “ ~ “ before the search looking like this ~? To make it searchable. Both characters can’t be used on the CTRL + F function if you try it as it is. You can find the wave line beside the number one on your keyboard!
10. FILTER
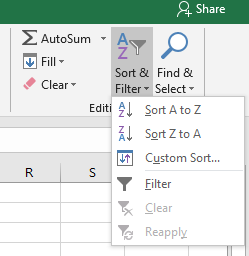
Finding data with specific qualifications can be easily done with this filter function. You can also remove blank cells or rejected qualities by ticking out the box on the filter. You can find this function on the home tab with its title "sort and filter." Once you click this, a drop-down button will be added to your data. Select this and you will find that your data can be sorted out according to similar qualities.
11. CTRL + ARROW / CTRL + PAGE UP/DOWN
Did you know that you could navigate faster if you hold down the CTRL key before you press up/down or PgUp or PgDn (page up or page down)? You can skip cells that has nothing in it or you could jump from top to bottom of the page. Try it yourself!
12. TRANSPOSE
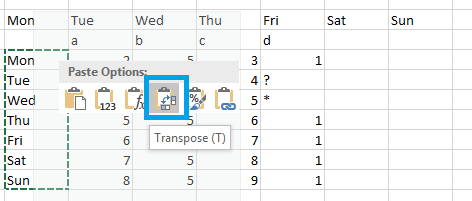
What does transpose mean? It’s the act of moving the data from vertical to horizontal or vice versa. It’s simply reordering or transferring the data to the cells you wish to move into. To do this, simply highlight the cells you want to move, copy it then select the cell where you want it to be placed. Right click on that cell then click the transpose icon. This will transfer the data horizontally.
13. UPPER CASE / LOWER CASE
Have you started a poll or a survey which was not answered properly? If you want to transform the text in a row’s cell to be in upper case / lower case or perhaps in a proper format, you can try these formulas: =UPPER(cell 1) or =LOWER(cell1) or =PROPER(cell 1) where cell1 is the selected cell to transform.
14. START WITH ZERO
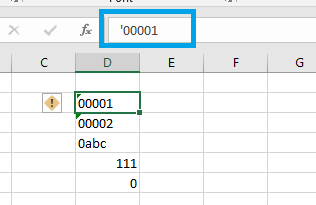
You can’t input zero first before other numbers in excel because it automatically removes it. You can, however, put zero alone or put zero before a letter OR put a quote mark before zero to retain it.
15. HIGHLIGHT AND GET DATA
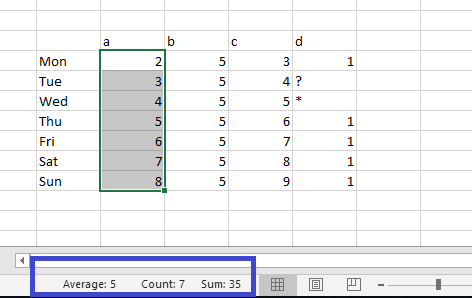
You can get quick data on your excel file without any formulas. When you highlight a group of cells, a summary will be presented at the bottom.
16. ADD A DIAGONAL LINE
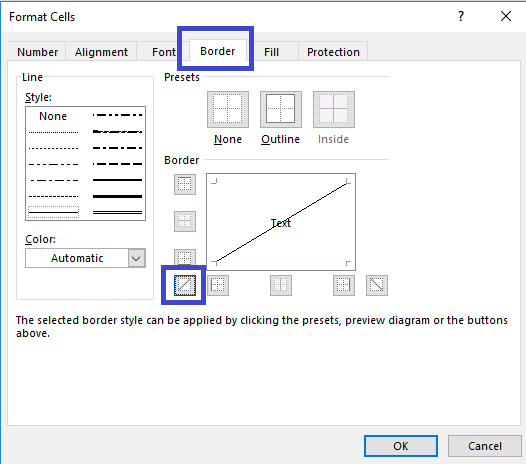
You can make borders on each cell, make it thick, dashed, dotted or even doubled but can you make a diagonal line on one cell? The secret tip here is to right click on the cell and choose “format cell.” Once the dialogue box is open, click the “border” tab and select the diagonal line. Now, who’s the expert on borders!
17. PIVOT
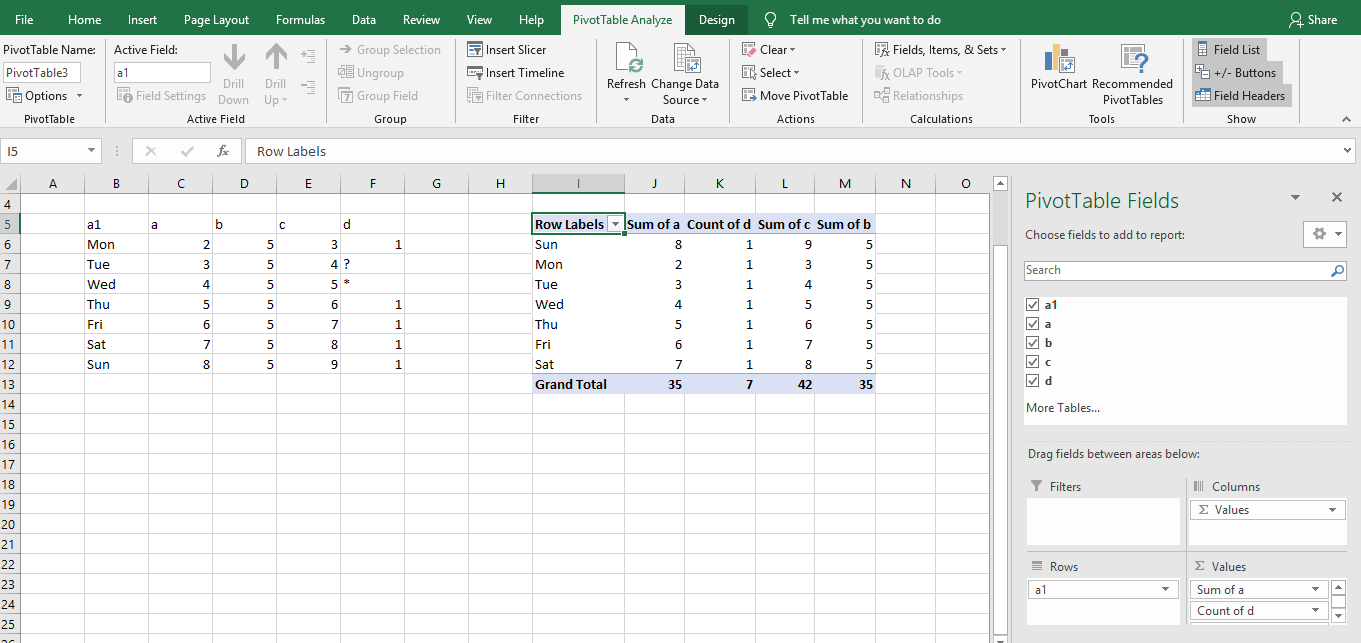
Make a quick summary report about your data in just one click and update it automatically. You can do this with a Pivot! Just Highlight the data you wish to include, click the Insert tab and choose Pivot. It will then prompt to confirm the data you included and if you want to put it in another sheet or in the existing one. Select your preferred option and click okay. Now from there, another dialogue box will appear on the side with the elements of your data. Drag and drop the elements to the columns or rows to create the summary table you want. See example below:
18. FREEZE PANES
We all know we can freeze the top row or the first column but what if we have a different requirement? If for example, you want to freeze the third row and the second column, you can do so by clicking the cell that intersects it then click the view tab and click freeze panes.
19. AUTOSUM / AVERAGE / and QUICK FORMULAS
Excel was made to make your life easier that’s why they made a quick formula button! You can instantly sum, average, count or show the minimum and maximum of your data with one click. You can do this by highlighting the cells, click the formulas tab then select the dropdown of auto sum button and select the one you need. The resulting amount will be placed on a new cell usually at the bottom.
20. REMOVE DUPLICATES
Don’t do it one by one! You can remove duplicates all in one by using remove duplicates in the data tab! To use this, highlight the cells involved then click “remove duplicates.” Confirm the removal with your current cells in the selected(continue with current selection) or in comparison with other columns/rows (expanded selection).
21. CONCATENATE / USING &
Combine the words from different cells into one cell – often useful for name databases or codes. Use the formula and select the cells just like this: =concatenate(cell 1,cell2) Or perhaps you can also use the shortcut: =cell1&cell2
Note: Cell 1 and Cell 2 represents the cells in your data


