
Turning your sewing patterns into full-sized digital PDF versions is becoming a trend to the DIY industry. Many readers find that these printable PDF patterns are better than buying in the stores as it saves them time and money. Independent designers have also started sharing their patterns, reaching out to those who prefer doing the craft than getting the end product. It has also been one way to monetize the pattern online with the digital version on hand.
We’re truly astonished at how many people have searched and requested how to do this online. So, here’s a walk-through of how you can turn your manually drawn sewing pattern into a digital PDF file so you can share this, preserve it (so you can do it all over again in the future) or even sell it online.
What do I need?
You need a few things before you can begin. First and foremost, you need Adobe Photoshop, minimal photoshop skills, a scanner, ruler, tape, pen, your pattern, a computer and your handy PDF converter – DeftPDF.
Step one: Start with your pattern. Create your own pattern manually, on your paper. Once this is already done, you can start scanning your pattern piece per piece. Most likely, your pattern will be bigger than your scanner, so cutting it into smaller pieces will be necessary. Use an a4 size paper or an 81/2 x 11 size paper as your basis for cutting (same size as your scanner). Make sure they are in JPG or JPEG file as you will use these in Photoshop/illustrator.
Step two: Open your software, create a new canvas large enough to fit your pattern and choose an image size of 150DPI. (DPI = 150 pixels per inch). This will be the resolution of your pattern is the actual size.
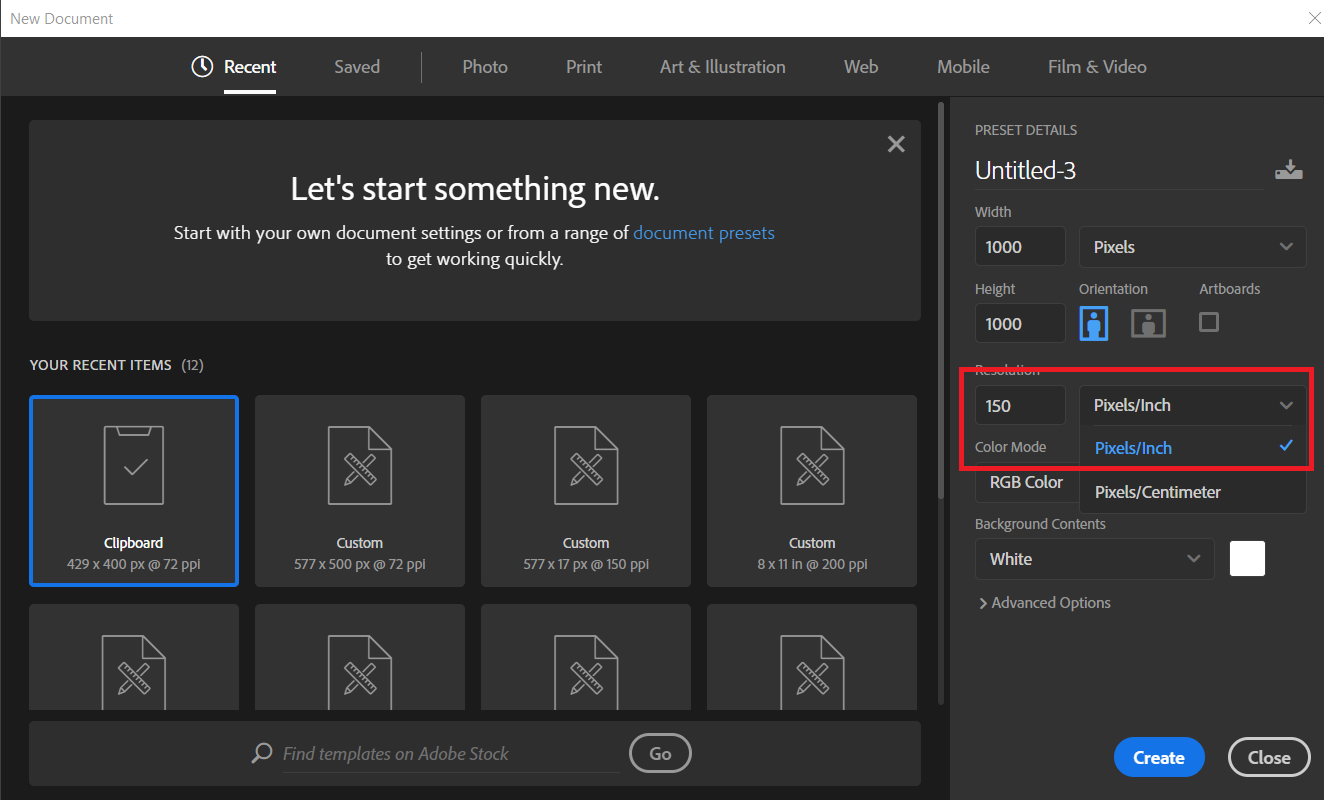
Once this is set, insert your images to assemble your scanned patterns, making one whole pattern. You can do this by opening the image, then dragging it to your new canvas. Do this to all of the scanned images.

When every piece is on the new canvas already, select an image and hit CTL+T. This will enable you to rotate, move and resize your image as needed to put them together. Assemble them as needed.

Note: Other methods may allow you to use a high-resolution camera to take a photo of your whole pattern. Just make sure to put a measuring device beside it so actual measurements will be used as your basis.
Step three: Start with a new layer then select the pen tool.
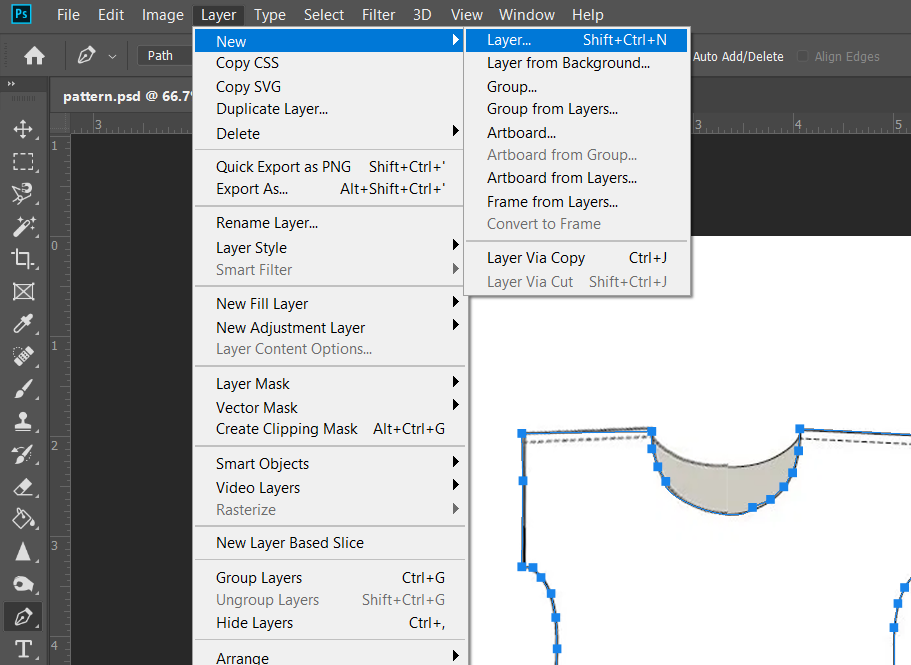
Trace your hand-drawn pattern with a Pen Tool to make digital clean lines. You can trace your drawn lines by clicking from point to point. The tool will stop creating lines once your back to the starting point. You can also adjust the points to make a curve on your lines.

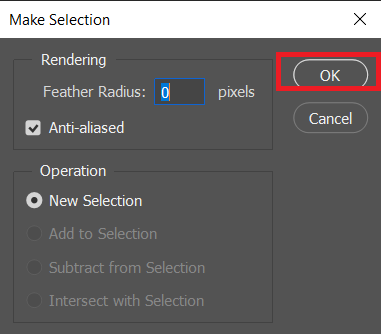
Step four: Select your line and right-click on one of the dots. Click “Make a selection” then click “OK” on the pop-up window asking for the radius. You will know that lines are selected if it blinks with dotted/dashed lines.
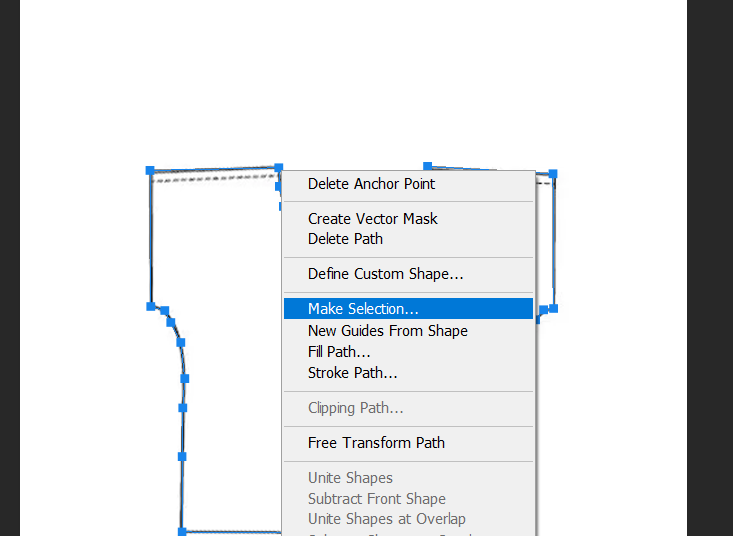
(then click ok)
Fill your line with paint by simply clicking the paint bucket and fill inside the outline you’ve drawn. You can use any color that you like as long as you can see it clearly.
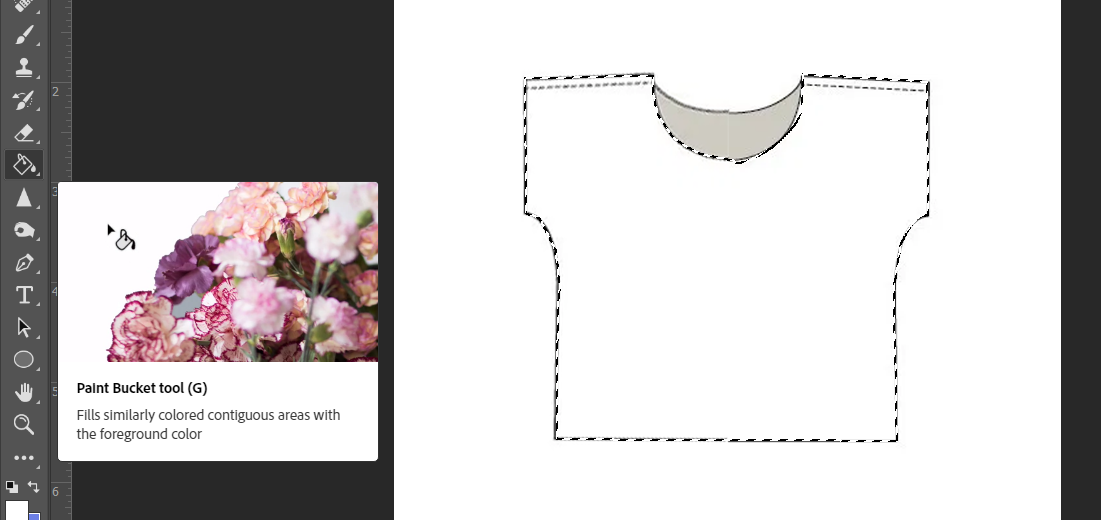
Step five: Repeat the steps above for all other patterns, if any. Add text to your pattern for labels or information that needs to be shown. E.x. Add measurements or branding in the middle of the pattern.
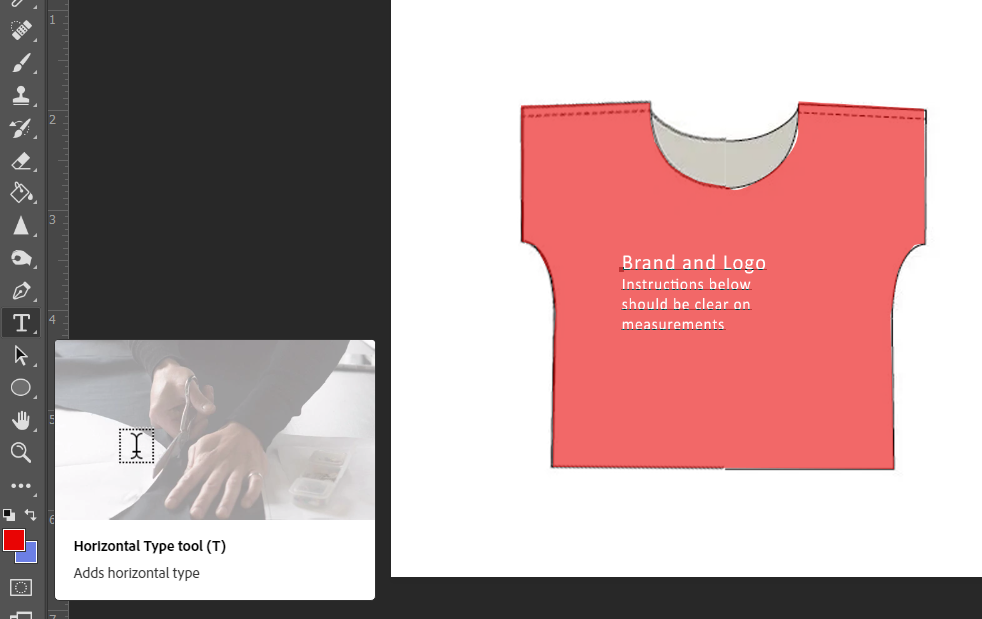
Step six: Add seams and allowances if needed. Then put markings on your tile of patterns to serve as your reader’s guide when trying to put this pattern together. Label them with arrows, instructions and cutting guidelines. You can arrange it as one whole pattern or have it tiled, ready for home printing.
Step seven: Add your brand/logo and your instructions on how to use the pattern.
Step eight: Save your pattern as PDF. Make sure to change the file format when you "save as" or you could also use our JPG to PDF converter if you've already saved it as a JPG file. This also supports BMP, TIFF and PNG files for conversion.


