Publications and print vendors would usually require certain standards before they can accept a printing project. Users would have to meet those requirements that are considered “print-ready” in PDF format so that the book will be set for actual printing. The book will need to be trimmed if the size does not fit or will be resized for a different paper. Using PDF format, the default size usually used by many popular applications is the A4 with plenty of limitations on customizing. So how do we overcome those easily?

Resizing your PDF easily
In the world of printing, there is such a term as “trim size” and it basically is about the size of the digital file that follows the actual paper size. If you say you have a 3 x 4 trim size, that means that the actual book will be printed this small. Therefore, when creating a PDF using popular applications like MS Word, the paper size should also be customized into 3 x 4 and saved in PDF with the same sizing.
If the PDF doesn’t follow and automatically becomes A4 (or whatever size your application defaults to), there’s always DeftPDF to help you resize your document easily! Here’s how to use the PDF tool online:
Step one: Go to DeftPDF.com and select PDF resize tool
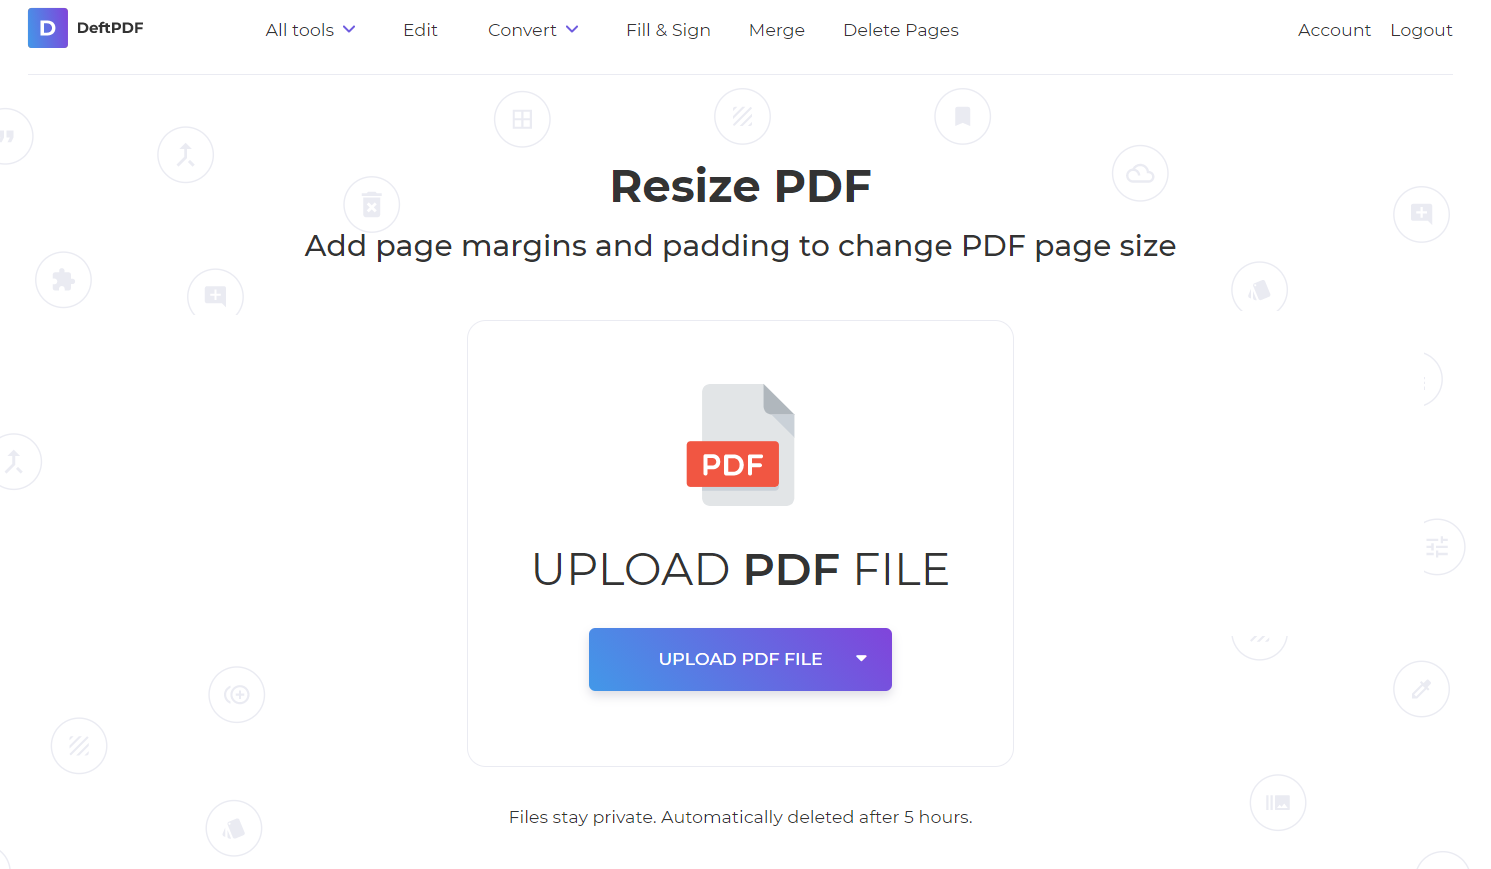
Step two: Upload your PDF and pick the result you want to gain. It can be adding margin OR replacing the paper with a different size.
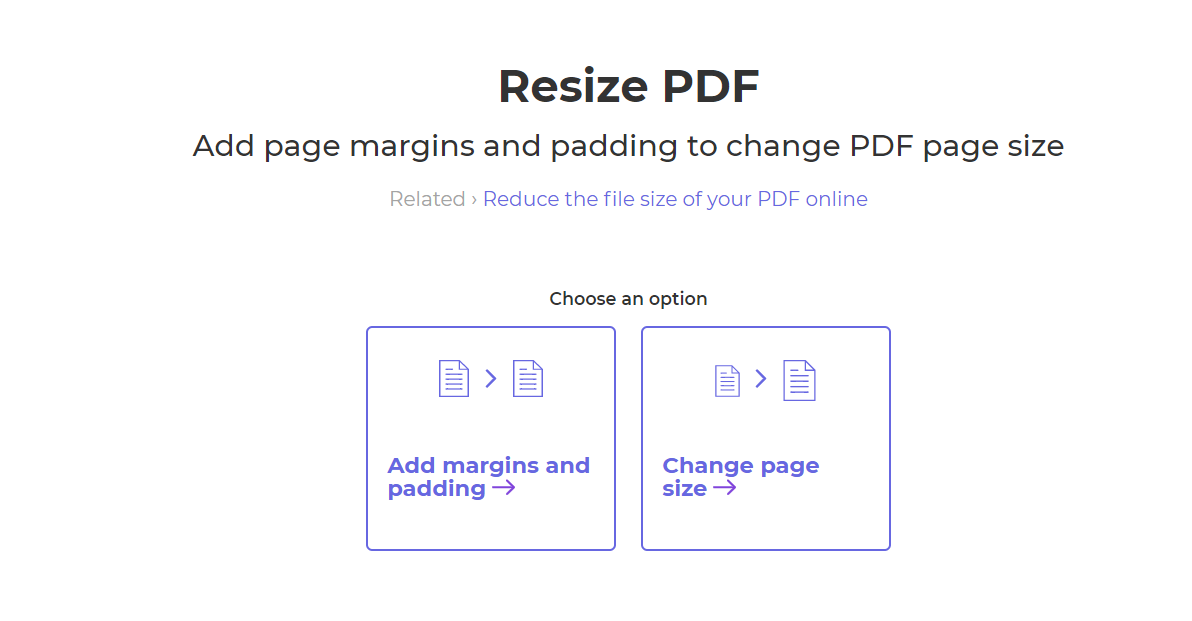
Step three: Select the preferred paper size/margin size and select resize to process then download your work.
Using other Applications
For those that prefer to do this offline, you can also resize your PDF using common applications like MS Word. If you want to create a PDF that ready and is suitable for print, you have to modify a few things first to avoid its default setting.
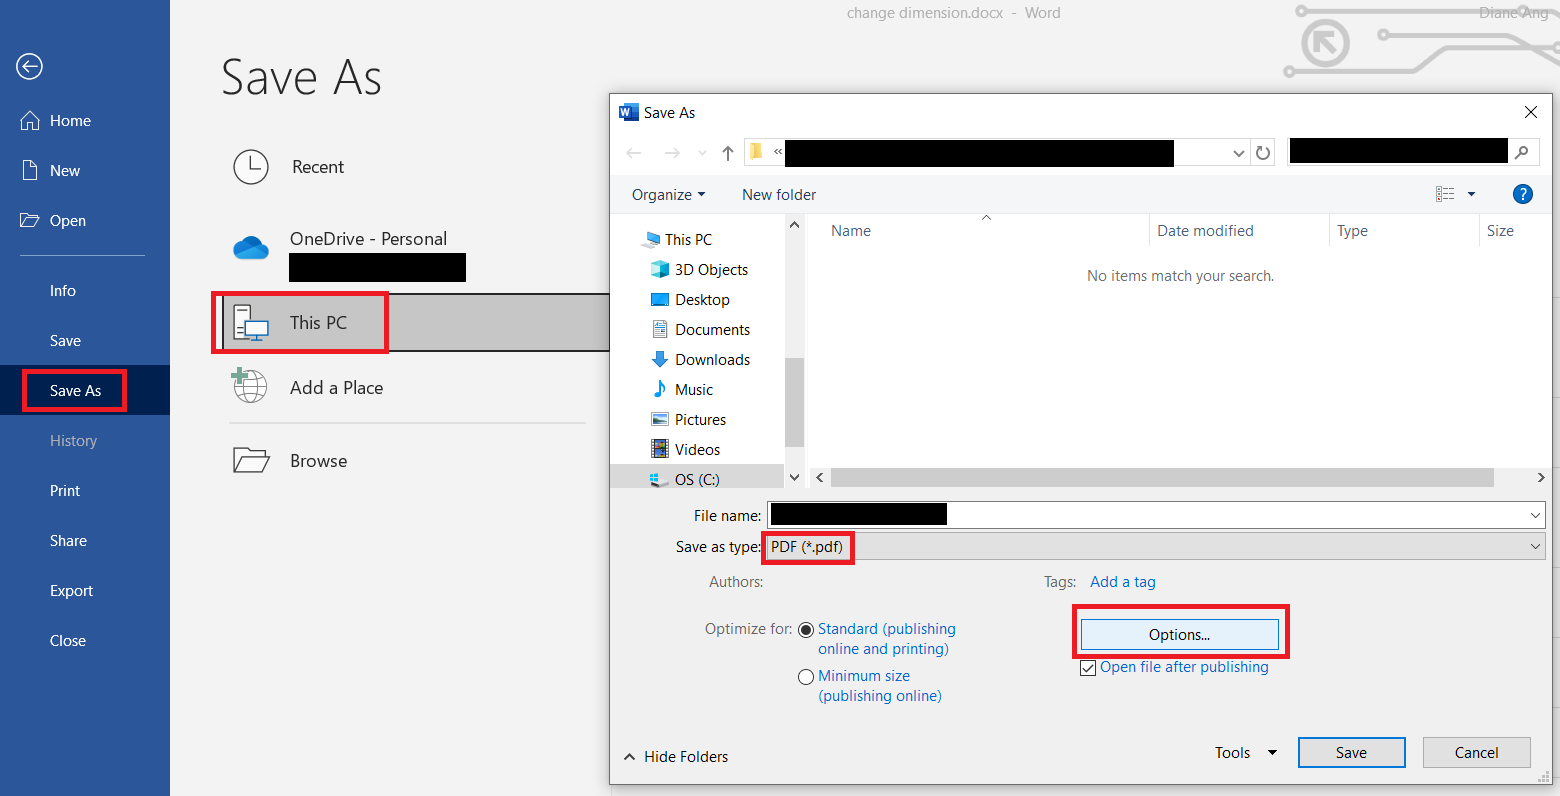
Step one: On your Word file on Microsoft, click FILE then click SAVE AS then select PDF to your preferred format. When you do so, the OPTIONS button appears.
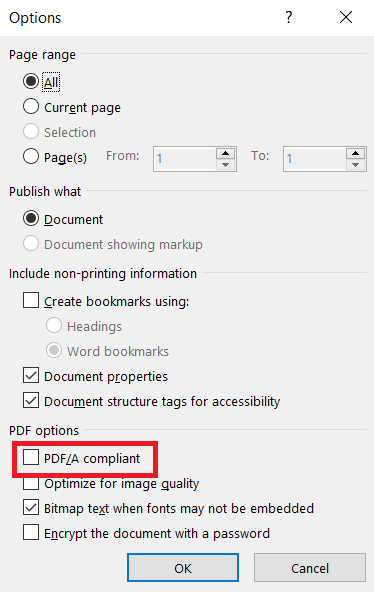
Step two: Click the OPTIONS. Another window will appear and from there, tick the box that says PDF/A Compliant. Then click OK.
Step three: Save your work as PDF.
On your Word file on Mac
Set up a trim size page before saving as PDF is easy in Mac. Make sure it is in the same dimension as the actual book to be printed by following the steps below:
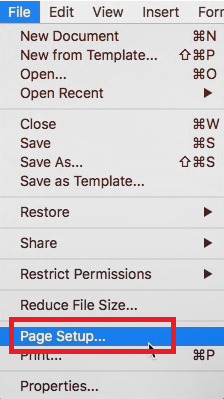
Step one: Click FILE then select PAGE SET UP
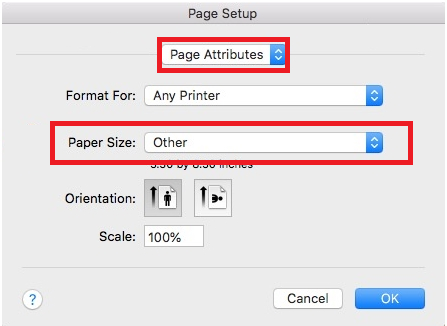
Step two: On the new window, select PAGE ATTRIBUTES and set the page size then click OK.
Step three: Save your document as PDF and check “BEST FOR PRINTING”
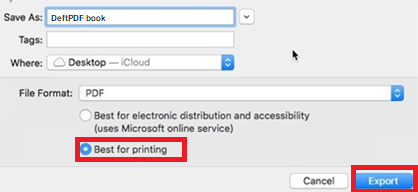
Note: Make sure to put the margins in 0 in so that it won’t create automatic margins and will follow your book’s format.
If MS Word is not your preference and you would like to create PDF using Apple Pages, (which by the way follows the same steps as the MS Word process mentioned where you have to create a custom page size similar to the actual before you create the content and save as PDF) then here’s a simple guide that will help you navigate through that application. Here’s how it’s done:
Step one: On the toolbar select FILE then select page set up then select the paper size or customize it. Then click OK.
Step two: Create the PDF by clicking FILE then select EXPORT then click PDF.
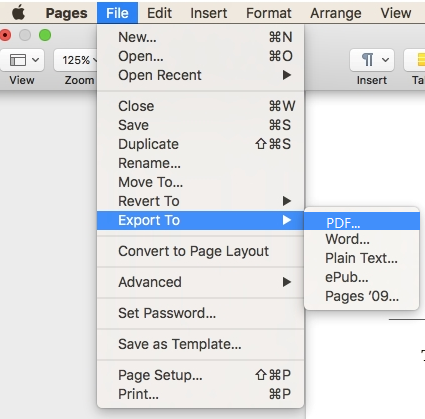
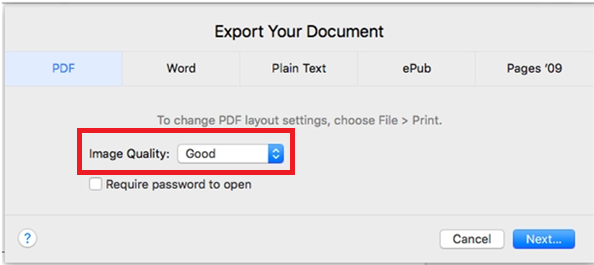
Step three: On the next window, select the highest image quality then click next. Then save it on your preferred location and click EXPORT.
