Did you know that you can actually create surveys and interactive forms with just your regular MS Word application? Yes, we do know that Word documents don’t technically need these elements since it is “editable” when opened by another user (as long as they have a Word Processor). However, these are useful for instances where users want to add encryption to questions and content. It is also most useful as a secondary choice when PDF is not an available option.
Here is how you can create an interactive survey with Word
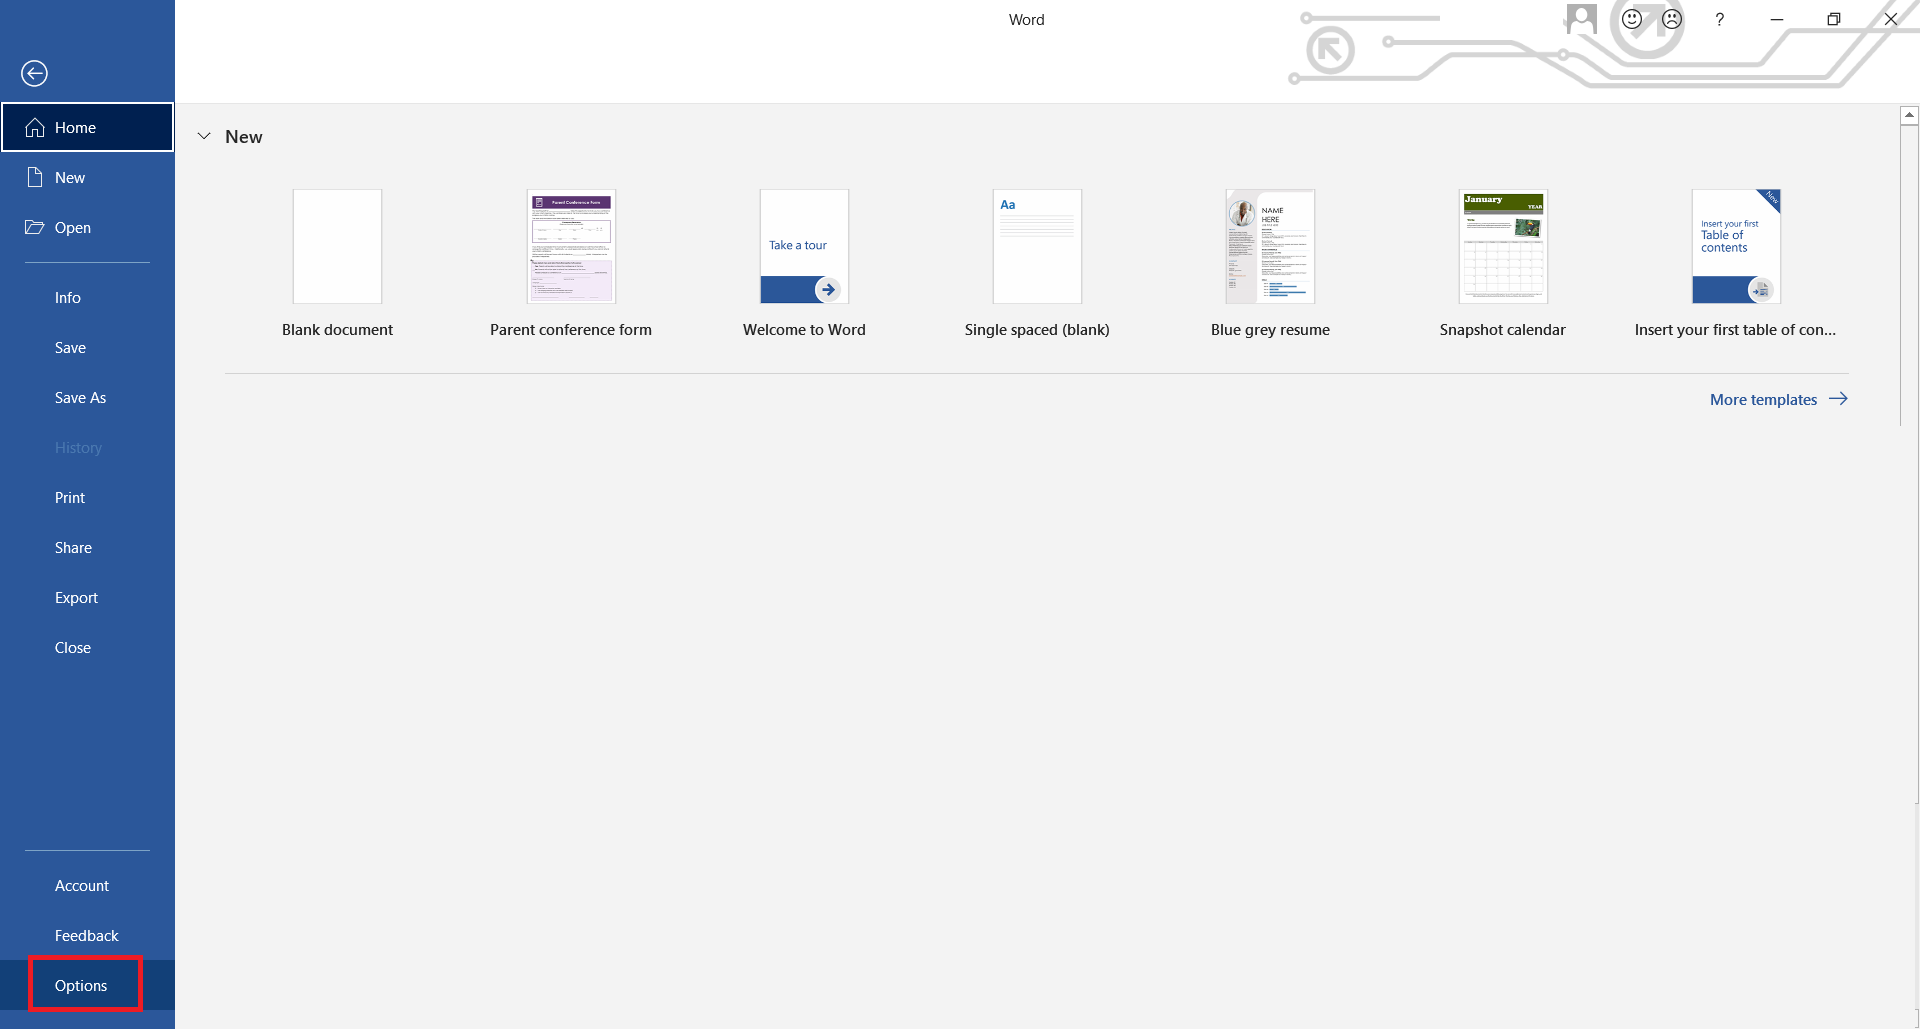
Step one: Enable Developer tools by clicking FILE then click OPTIONS.
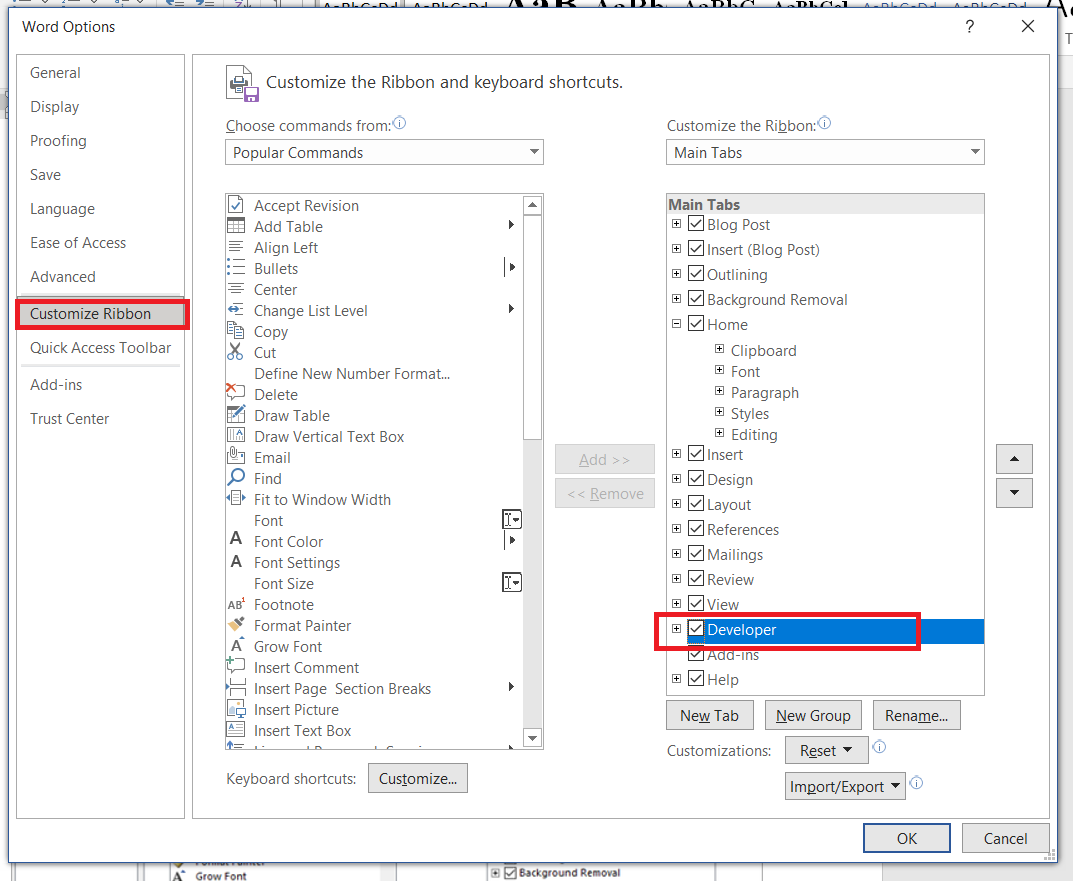
A new window will appear, click CUSTOMIZE RIBBON, then tick the box beside DEVELOPER on the list.
Step two: A new tab will appear on your screen, which is the DEVELOPER tab. Click that tab and select DESIGN MODE. Once you enable this, you can now add a few interactive elements.

Step three: Add form elements by selecting the control contents. You can add a text box, a checkbox, a calendar, a drop-down list, and even an image.
To place a checkbox, click the check icon and click where it should be placed. You can type the options on the left or the right side of the checkbox. The checkbox will look like a box inside a rectangular unit.
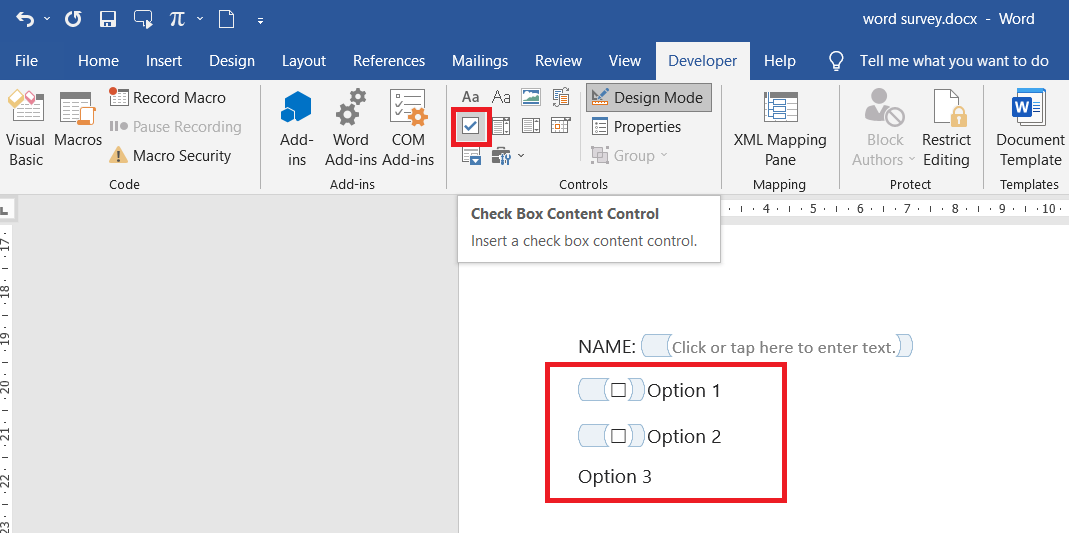
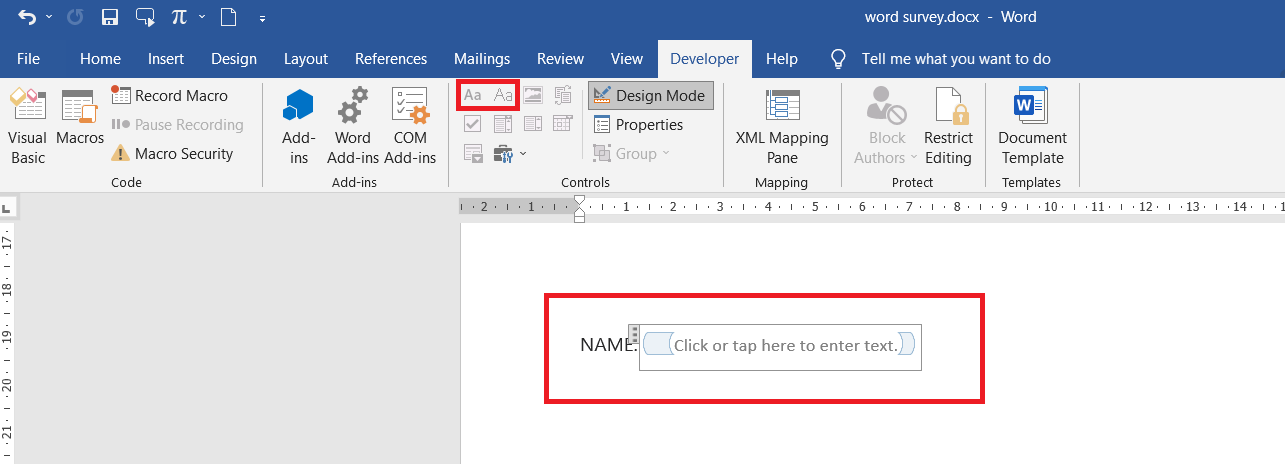
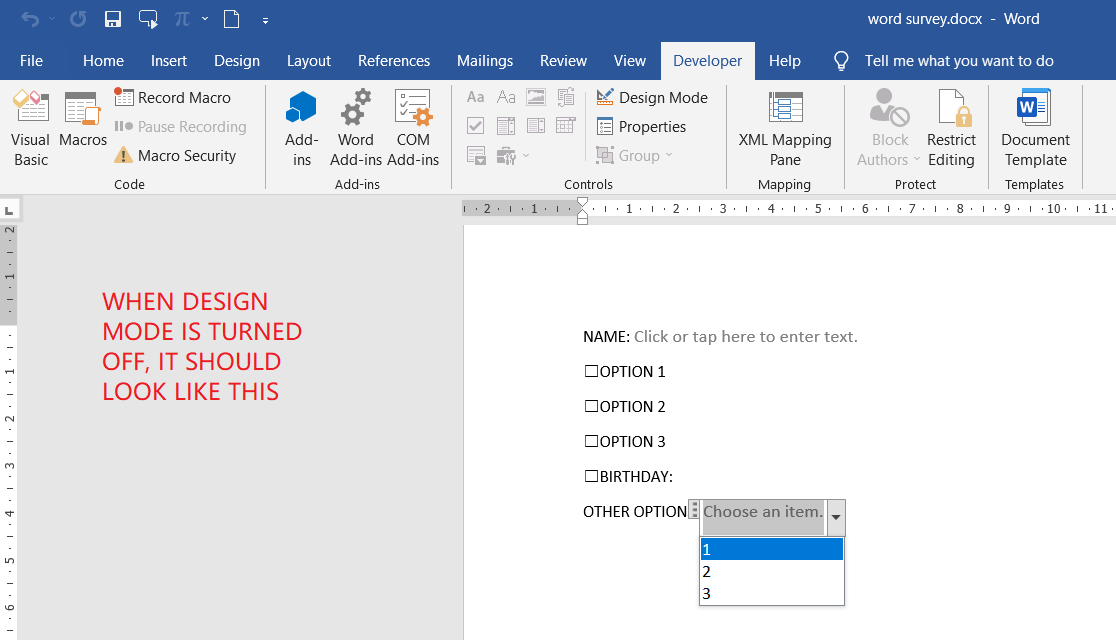
To place a text box, simply click where the text box should be placed then click the Aa icon. It will automatically create a rectangular unit that says “Click here to enter text.” (See figure below).
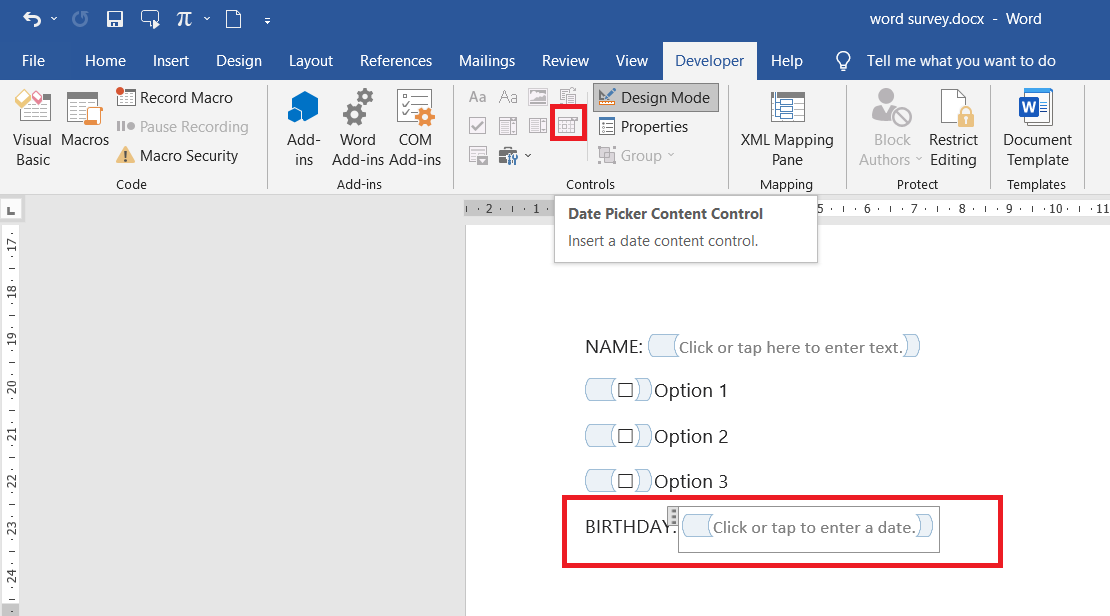
To place a date selector with a calendar, click the square icon that looks like a mini calendar. This icon is the date field.
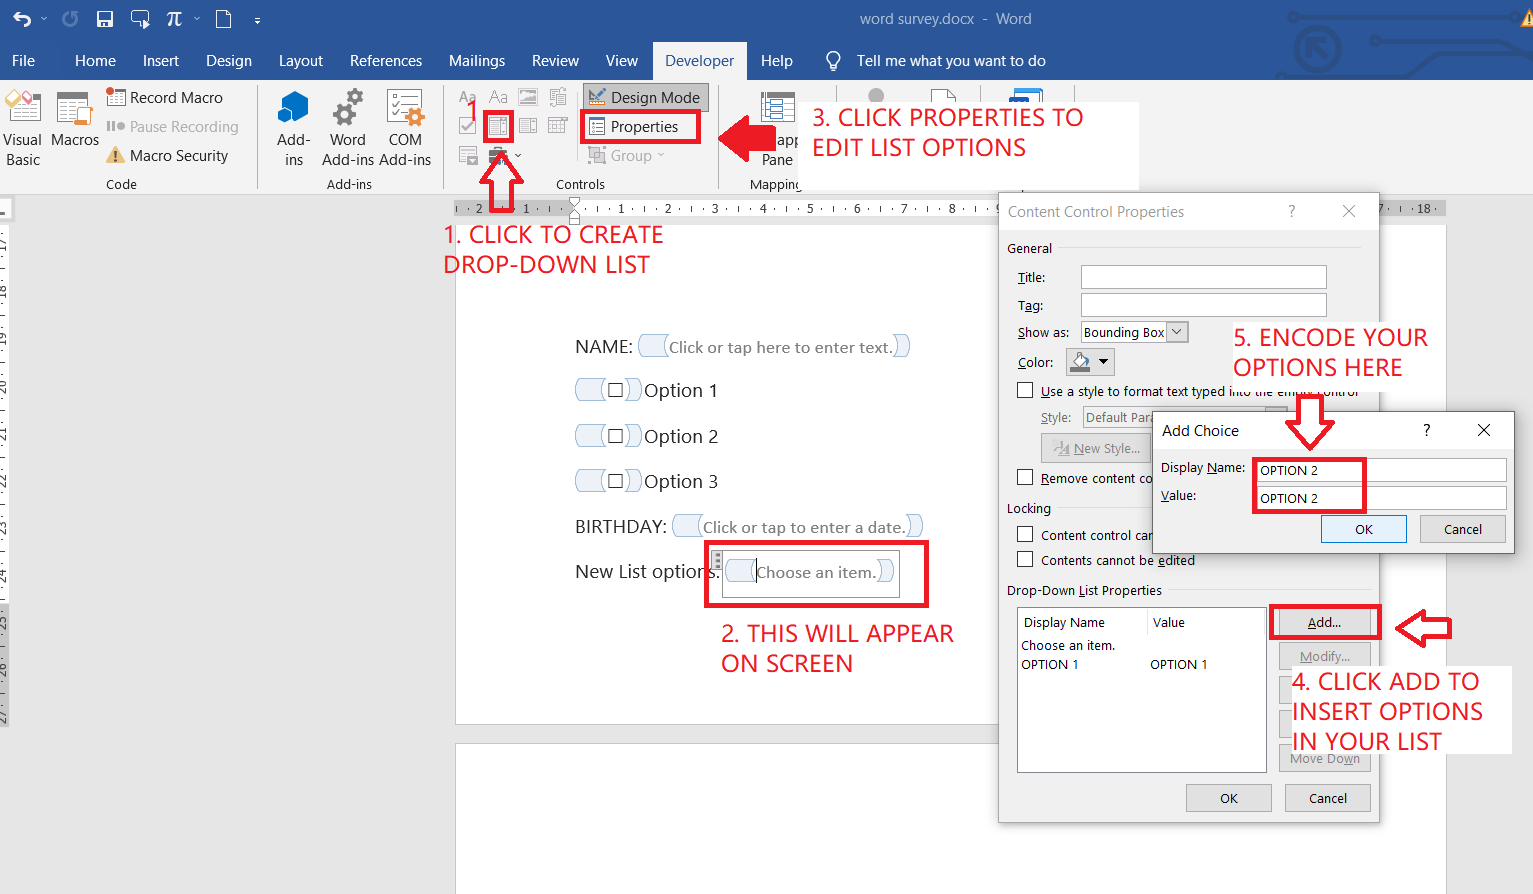
To place a drop-down list on your document, click the area where you will place the list then click the COMBO BOX CONTROL which is the icon beside the checkbox.
Modify the list by clicking PROPERTIES. A new window will appear on your screen. Click ADD to add more options in your list and encode the preferred content. You can also modify it by clicking on the item then click MODIFY.
Step four: Now that you’ve added all the elements you want, you can now turn off the DESIGN MODE by clicking it. Once you’ve turned it off, all elements should look like professional interactive form fields.
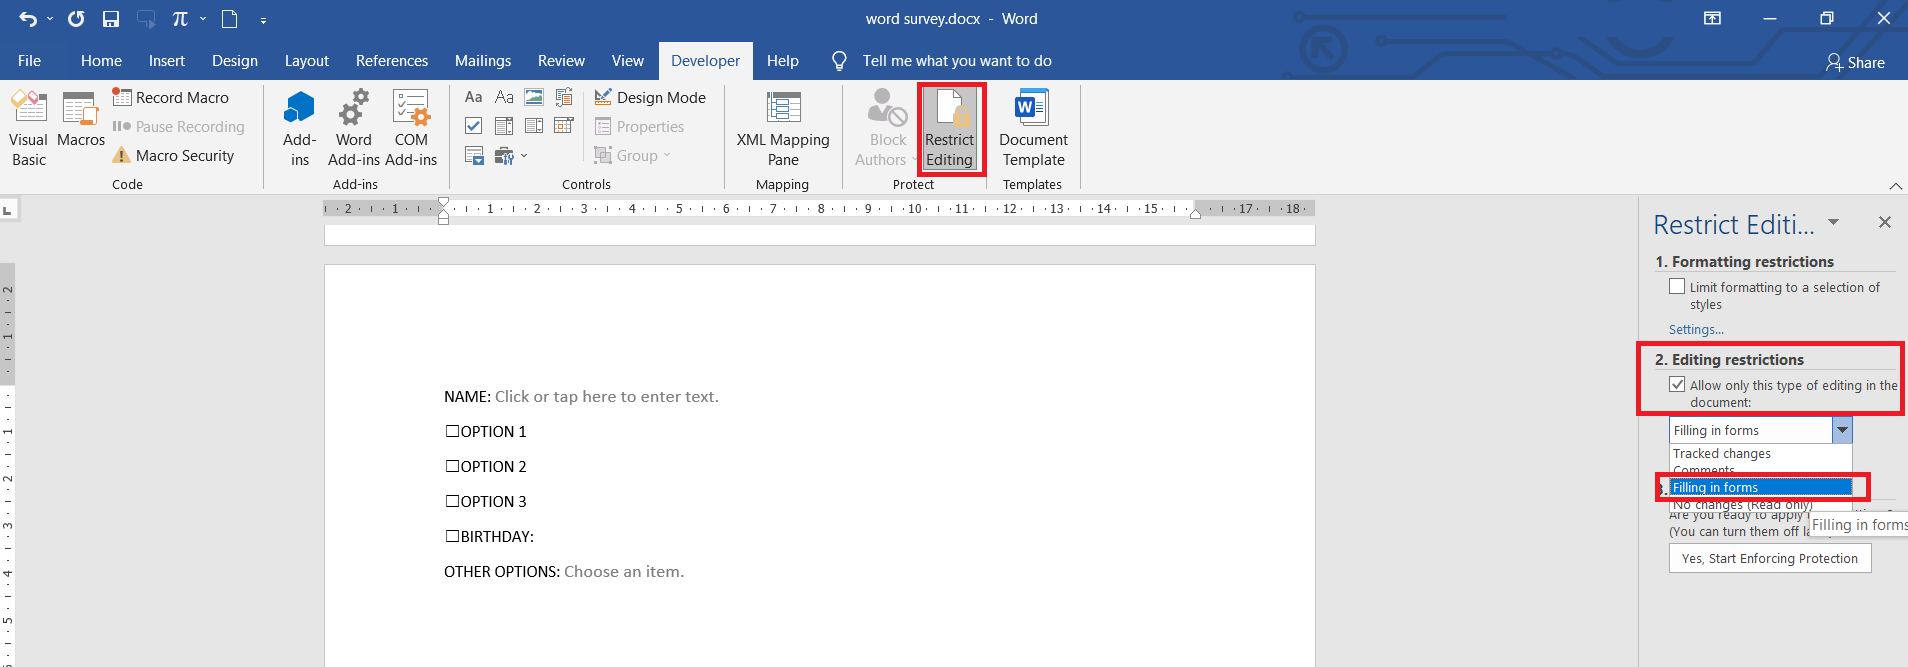
Step five: You can also encrypt and restrict editing of the questions and content by clicking RESTRICT EDITING under the DEVELOPER tab. Enable FILLING IN FORMS then click “Yes, start enforcing protection.”
Other methods of creating a fillable form
Word is convenient for basic users however if this document is needed for international purposes, PDF is still the way to go. If you save your survey in PDF, you will notice that all the elements made from the word will become flat and won’t be able to be “fillable.” To make it interactive, you will need a PDF editor to add the elements. Here’s how to do it with DeftPDF online. Don’t worry, it’s free!
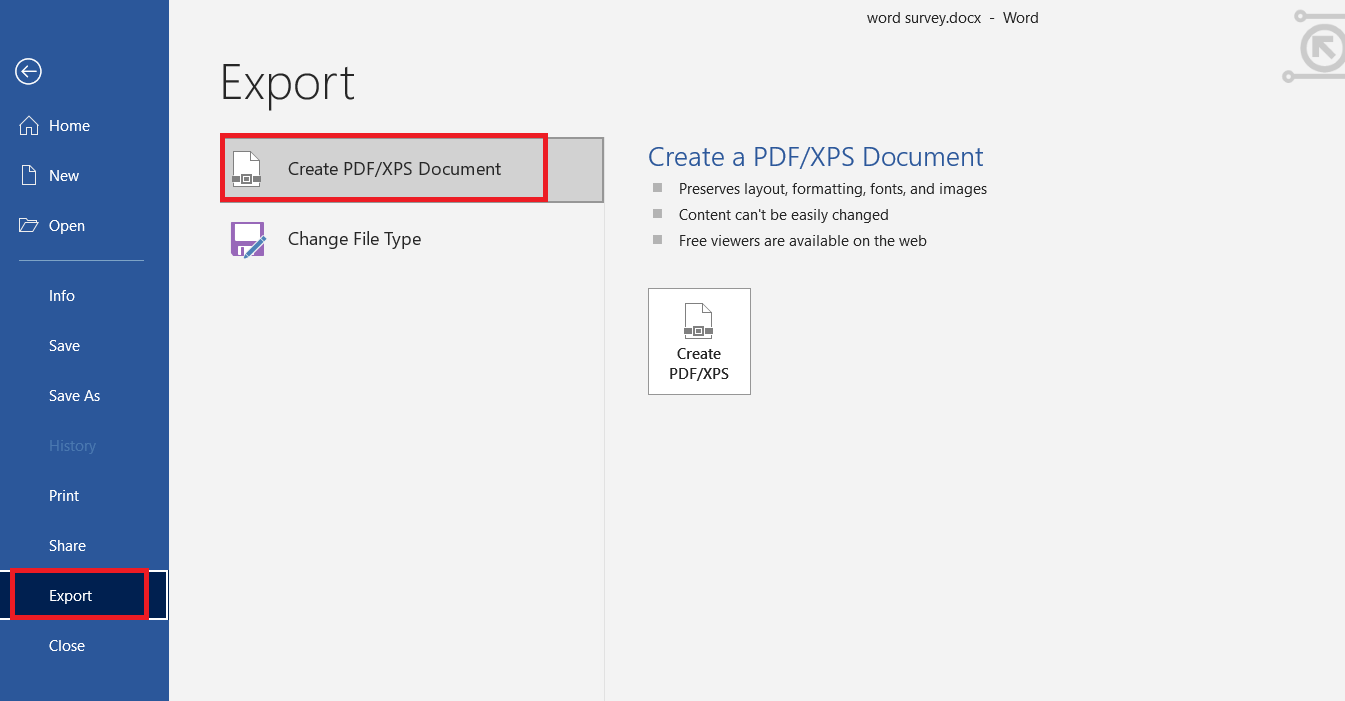
Step one: Save your form into PDF by clicking export to PDF.
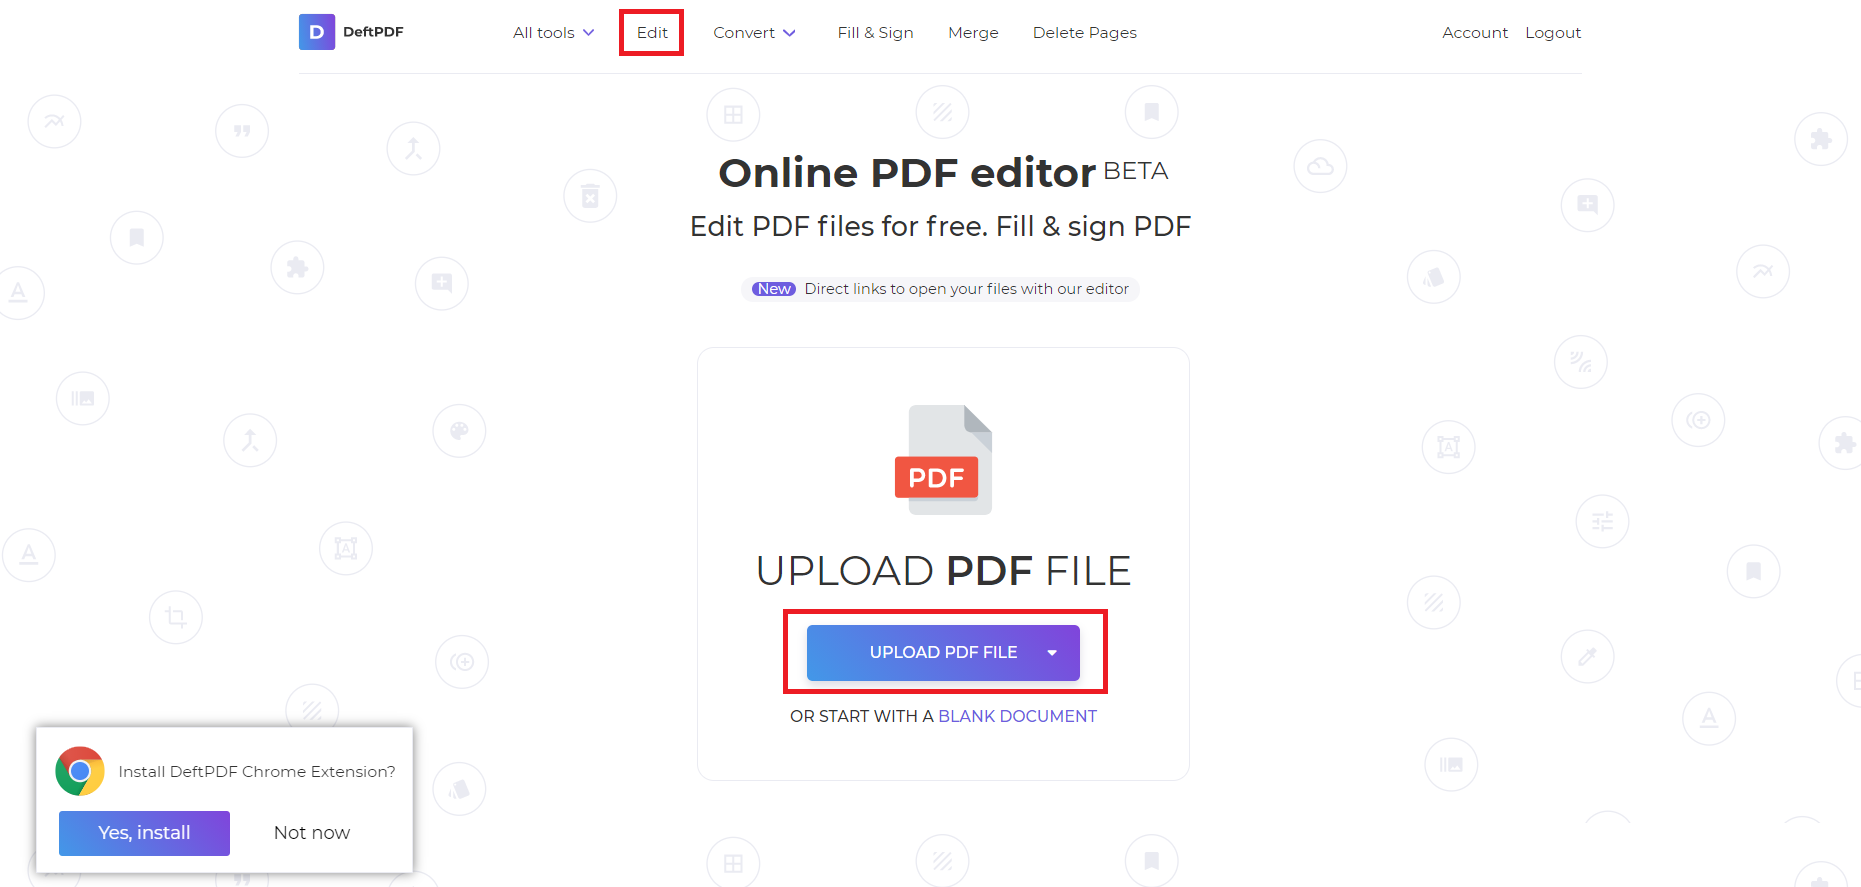
Step two: Upload your PDF file to DeftPDF’s editor
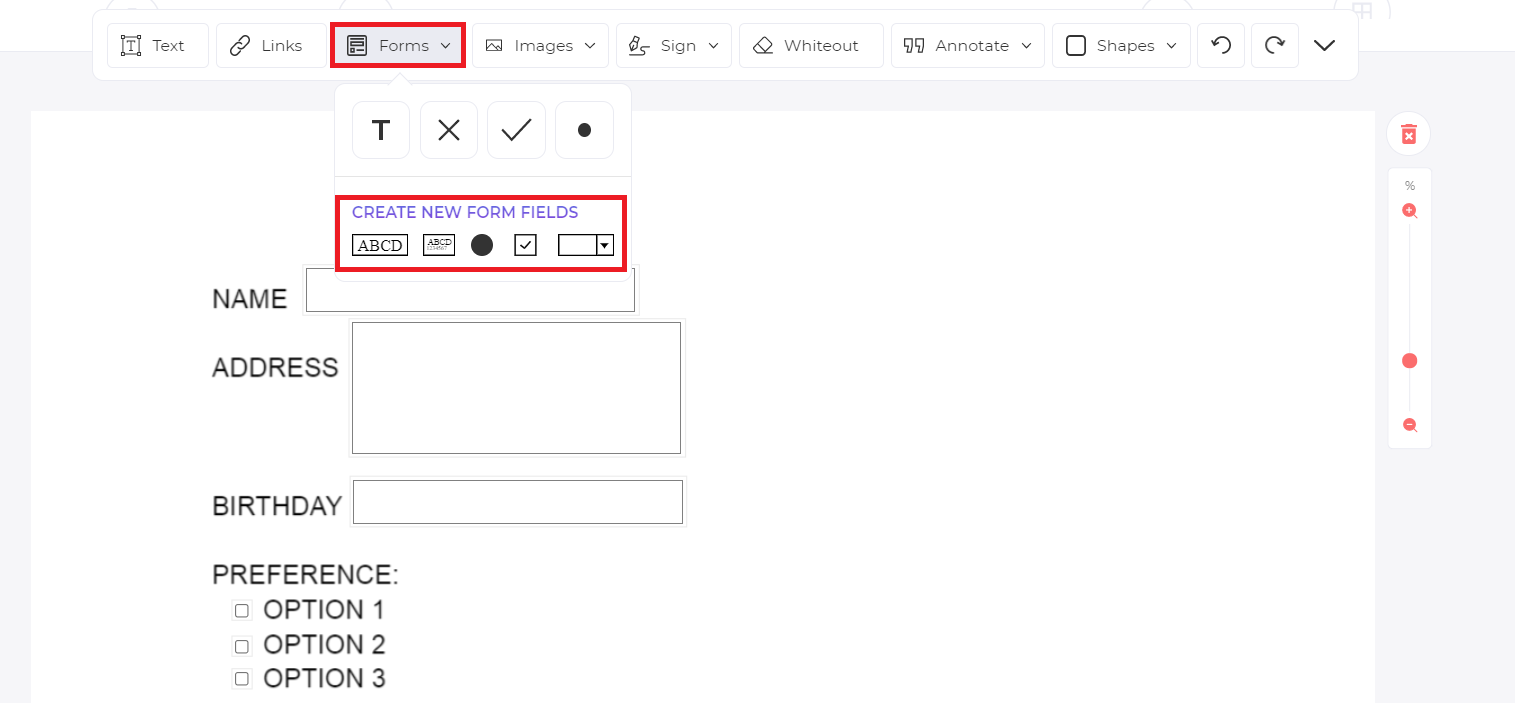
Step three: Add form elements by dragging and dropping them. Use the necessary form tools from the toolbar. You can add text boxes, checkboxes, radio buttons, a drop-down list,s and large text boxes for addresses.
Step four: Save by clicking APPLY CHANGES then download to save your file into your computer. This will then provide you with a PDF document with fully interactive form fields.
